Natural Beauty Tip — Fade stretch marks away with egg white

Stretch marks are those whitish-bluish lines on our skin which often are a result of sudden growth, weight loss or stretching of the skin. Most people have stretch marks on their body, especially around the buttocks, arms and thigh area. After pregnancy, many women also have these marks around their belly region. Though you cannot completely do away with stretch marks, one way to lighten them is by applying egg white.

Egg white helps in fading away those ugly lines as it is rich in protein. Our skin too is made up of protein and when nourished with it, it goes back to its healthy state. Here’s how to use it.

  • Steps:
    Get the white of two eggs (you can take more depending on the areas you wish to apply it on).
    Whip them properly to get a thick paste.
    Now apply it on the stretch marks, make sure it is a thick layer.
    Leave it to dry.
    Later, wash the area with lukewarm water.
    You need to keep the area well-moisturised, so apply olive oil or a good moisturiser.
    Use this paste once a week to see visible results.

Remember, your skin takes time to heal, so do not discontinue it after a week or two. You will start seeing results within a month for sure. If you are not too fond of using egg whites, here are some more home remedies to fade them away. You may also like to read a few myths about stretch marks and these cosmetic options to treat them.

Source: The health site


Winter hair care: Natural oils and remedies to reduce hairfall problem

Do you often face one of those mornings where your bathe drain is blocked because of all the hair you’re shedding? It is true that losing hair is really heart breaking and the sight of seeing yourself going bald during your heydays is really a nightmare.

Hair fall is a common problem that people face these days. Now, hair loss can be due to various reasons. Our hectic schedules do not spare us ample time to maintain a beauty regime. Further, our unhealthy lifestyle and bad food habits add to the problem. Don’t worry much as we bring to you some herbal oils that you can use daily and weekly to reduce hair fall.

Olive oil: Rubbing hot olive oil into your scalp for at least one or two hours can help retain the moisture of your tresses as this will replenish hair roots and provide them intense nourishment

Almond oil: Almond oil is an essential source of vitamins D and E and acts as a natural moisturizer for your hair by preventing them from turning dry, dull and frizzy. Massaging your hair a night before hair wash can actually leave you with healthy, thick and strong hair.

Coconut oil: One can directly apply coconut oil to the roots of your hair by using your fingertips. It actually helps in repairing damaged hair and split ends. Applying warm coconut oil into scalp can effectively improve blood circulation and deliver essential oxygen to your hair.

Castor oil: Castor oil is the answer for almost all of your hair queries. Applying castor oil regularly into your scalp boosts blood circulation and provides necessary oxygen, thereby leading to hair growth. Also, it is a rich source of vitamin E and omega-6 fatty acids that help retain hair moisture and prevent split ends and breakage.

Rosemary with coconut oil: Rosemary can stimulate hair growth. Rosemary herb extractions, when mixed with coconut oil and applied over the scalp, are known to stimulate hair-bulbs and help prevent premature baldness.

Aloe vera gel with coconut oil: Aloe vera contains antibacterial and antifungal properties which help a lot in keeping a check on dandruff. Mix some aloe vera gel in coconut oil and apply it into your scalp for around 30 minutes and later wash it off. It helps in blood circulation and also fights against alopecia.

Amla with coconut oil: Amla works as a hair tonic and is an essential ingredient for hair care. Applying a paste of amla powder mixed with some coconut oil does not just help in strengthening roots of hair but also enrich hair growth. It also prevents dandruff and premature greying of hair.

So, go on, make the most of these tips and banish dry hair and hairfall troubles during winters.

Source: zee news


What causes white hair and how to slow down that process

How to slow down the appearance of gray hair.
As people get older, their skin changes and their hair becomes white. This is the natural process of aging and it is impossible to avoid, but there are ways that this process can be slowed down.

A few words for white hair.
Your hair becomes white when it begins to lose the natural pigment, known as melanin which is primarily responsible for skin color. Although greying of hair is a natural process, it can be caused by many other factors such as: genetics, stress, malnutrition or health disorders, and some bad lifestyle choices.

The more you smoke, the more your hair becomes white.
Speaking of bad lifestyle choices, we thought about this – smoking. Smoking accelerates the aging process of the body, including hair. The first thing you need to do is to quit this bad habit.

Goodbye to coffee, alcohol and junk food!
Too much alcohol and caffeine, and junk food is harmful for health and hair. They can only cause premature aging. Avoid fast food, limit your intake of white flour and refined sugar. This food lowers energy and you wont get anything in return from them. Your hair needs healthy foods to stay young.

Water is the name of the game!
If you are not sufficiently hydrated, nutrients will not be able to easily reach your hair follicles. That lack of hydration can cause premature whitening of hair.

Are you stressed?
White hair can be caused by stress and anxiety. If you are a long time stressed or if you are upset or concerned, your hair will faster turn gray. Control your stress by exercising relaxation techniques: yoga, deep breathing, meditation, tai chi chuan, etc..

Daily exercise helps.
Good blood circulation, and normal blood pressure is basically great prevention for gray hair. In fact, it is almost useless to consume adequate food, if they can not reach the hair follicles and thats why you need to exercise.

Ensure the blood supply to your hair by massaging it regularly with appropriate oils. Exercise daily to increase circulation and improve blood flow.

Eating chicken may reduce the appearance of grey hair? A lot!
For the production of melanin, pigmet responsible for producing hair color, you need protein. Therefore, eat foods rich in protein such as: chicken and turkey meat, sprouts and soy crops.

Take B vitamins – B2, B6, B12
The lack of these vitamins can cause gray hair. Therefore, eat whole grain bread, bananas, eggs, dairy products, poultry and green leafy vegetables.

You are what you eat.
Lack of copper can also cause significantly premature greying. One way to prevent this is to eat foods rich in this element as spinach, beef liver, sunflower seeds, lentils, almonds, seafood, egg yolks and mushrooms.

On your menu put food rich in iodine.
Iodine is an important mineral for your hair. Foods rich in iodine is banana, carrot, spinach and fish.

And selenium!
Add selenium in your menu. This foods will help: clams, tuna, salmon, corn, wheat, soybeans, brazilian nuts and sunflower seeds.

Massage your scalp.
Massage your scalp with coconut oil and lemon. And it’s a good way to keep your hair with youthful appearance. But if you really want to benefit from massages, you’ll need to do them regularly.

Source: secretly healthy


For Varicose Veins, Laser Treatment Is Best

When treating varicose veins, laser therapy remains the best option, a new study says.

Researchers in the study examined 798 participants who had varicose veins and were treated at 11 vascular surgery centers in the United Kingdom, between November 2008 and October 2012. The participants underwent one of three types of treatments: closing off the veins with a laser, injecting a drug “foam” into the vein or surgically removing the vein.

After six months, the researchers compared the outcomes, looking at how well the treatments worked and at their complication rates, as well as how the participants rated the change in their quality of life since their treatments.

“The main findings indicated that laser therapy was the preferred treatment for varicose veins,” said study author Dr. Julie Brittenden, a professor in vascular surgery at the University of Aberdeen in Scotland. “We found that all three treatments reduced symptoms associated with varicose veins, but there were fewer complications after laser treatment

What causes varicose veins?

Varicose veins are blood vessels that have become swollen, enlarged and twisted. Improperly working valves in the veins cause the disorder, Brittenden explained. In people who have this condition, blood returns up to the heart from the veins in the legs because of the contraction of the calf muscles, she said. Normally, valves in these veins prevent blood from flowing backwards, down towards the feet.

“People with varicose veins have leaky valves, which means that some blood flows backward and pools in the veins, causing them to become enlarged,” she said.

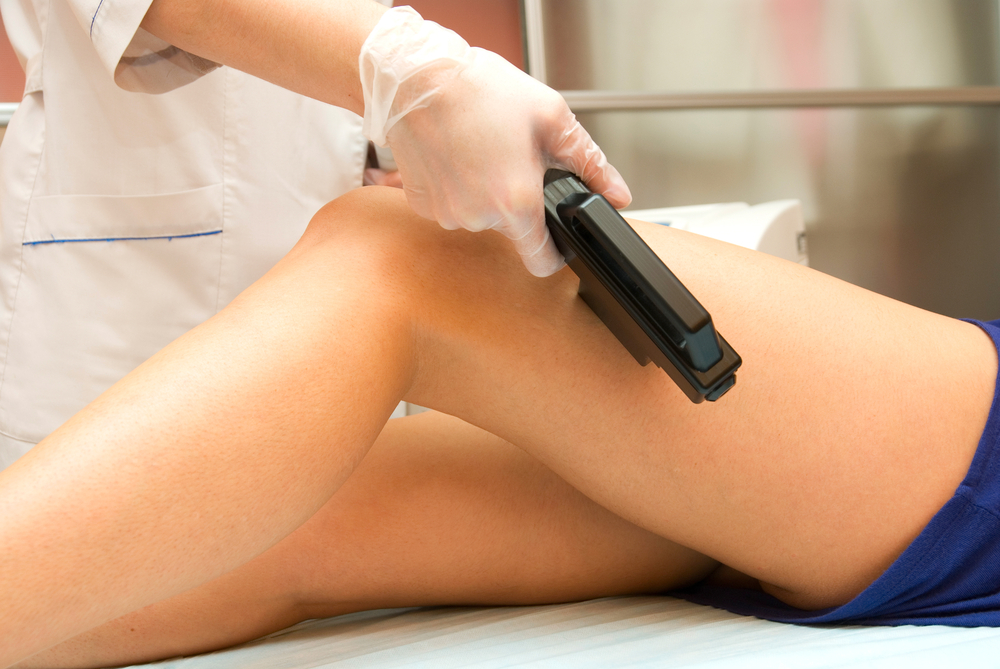
The procedure called endovenous laser ablation, or laser therapy, uses heat generated by laser energy to seal off faulty blood vessels, diverting blood flow immediately to nearby healthy veins.

Foam treatment involves injecting drugs into a blood vessel. The medicines, when mixed with air, cause the vessel wall to thicken, which also helps to seal off blood flow. The recent study showed that foam was less likely than the other treatments to completely close a vein that had leaky valves, which may increase the likelihood that a patient will need future treatment, Brittenden said.

In the study, about 1 percent of patients who underwent treatment with a laser experienced complications such as lumpiness, skin staining and numbness. About 6 percent of those who received the foam treatment, and 7 percent of those who underwent surgery experienced such complications, according to the study.

The researchers also found that successful ablation of the great saphenous vein occurred in 83 percent of those who received the laser treatment and 84.4 percent of the participants who underwent surgery. These numbers were significantly higher than the 54.6 percent who had such successful ablation after the foam treatment. The great saphenous vein, the longest in the body, runs along the length of the leg.

The study appears in today’s (September 24) issue of the New England Journal of Medicine.

Dr. Kevin McMullen, a vascular surgeon at Surgical Hospital of Oklahoma who was not involved with the study, said he agreed with Brittenden’s conclusion. “Laser is preferred over surgery or foam due to higher success rates with the least amount of complications,” he said.

Laser therapy works better than foam on larger veins, as the success rates for foam treatments worsens with increasing vein size, McMullen said. However, surgery may be the best choice for patients who have previously had vein procedures, or who have anatomical issues, such as veins that are very close to the skin or are larger than three-quarters of an inch (20 millimeters) in diameter, he said.

Can varicose veins be prevented?

Varicose vein treatment is not done just for cosmetic reasons, Brittenden said. “People with varicose veins often suffer from aches and discomfort,” she told Live Science. “The condition can also cause swelling of the ankles, skin changes and sometimes ulcers.”

Both men and women get varicose veins, she said. The condition is more common in pregnant women, older patients, overweight people and those who stand for long periods. It is also more prevalent in people who have a family history of varicose veins.

People can’t prevent varicose veins from forming, but may be able to delay their formation or prevent existing varicose veins from getting worse, according to the National Institutes of Health. The NIH recommends that people avoid standing or sitting for a long time without taking breaks; avoid crossing their legs when sitting; and keep their legs raised when sitting, resting or sleeping.

Losing weight and doing exercise that works the leg muscles can also help, the NIH said.

Brittenden said that she and her team plan to follow the study participants for five years, as long-term results are important in determining longer-term costs and consequences of each of the treatments, such as recurrent varicose veins.

Source: yahoo news


Homemade face mask recipes

I love to pamper my skin, and with great homemade face mask recipes, I can do that from the comfort of my own home! Finding the perfect homemade facial mask recipe for your skin type can seem daunting, so check out this collection of 10 amazing homemade face mask recipes — you’re sure to find the perfect mask recipe for your beauty routine!

1. Nutmeg, Honey, and Cinnamon Mask Recipe — This soothing facial mask recipe is the perfect way to relax after a long day. Nutmeg and honey are natural anti-inflammatories, which can reduce swelling and redness in your skin. This homemade face mask recipe sounds lovely!

2. Heavenly Honey Citrus Mask — Marie Clare offers this honey citrus face mask recipe. This luscious honey and orange based mask will give your skin a beautiful healthy glow. Sounds good enough to eat!

3. Avocado Egg White Face Mask Recipe — Combine the oil-fighting powers of avocado with the pore-tightening properties in egg whites, and you get one powerful acne-fighting homemade facial mask! This avocado egg white face mask will do wonders for oily skin.

4. Nourishing Honey and Oatmeal Facial Mask Recipe — If you have dry skin, you’ll want to find a facial mask that can moisturize and nourish. This honey and oatmeal mask will not only add moisture to your skin, but it will soften and smooth even the most tired skin.

5. Homemade Cucumber Mask Recipe — I adore the fresh scent of cucumber, so this cooling cucumber facial mask recipe is definitely at the top of my list. Cucumbers are full of water, so they will not only hydrate your skin, they are loaded with Vitamin A, B, and C, as well as minerals including: magnesium, potassium, manganese, and silicon. You truly can’t go wrong with a cucumber mask!

6. Brightening Daisy Mask — Who ever would have guessed that daisies would be great for your skin? This video tutorial teaches you how to make your own daisy mask at home for brighter, youthful skin.

7. DIY Mud Mask Recipe — Of course, the most common type of mask is a mud mask. I love the way a good mud mask makes my skin feel, and this DIY mud mask recipe looks really nice. This mud mask is particularly great for oily skin.

8. Strawberry Face Mask Recipe — Actually, the strawberry facial mask recipe (which is super-simple) is only one of many in this fabulous round-up of homemade face mask recipes that offers a variety of easy mask recipes for different skin types. This is a great resource, you’ll definitely want to bookmark it!

9. Coffee and Cocoa Face Mask Recipe — Yum, how does a coffee and cocoa facial mask sound? When it comes to homemade face mask recipes, this one is perfect for waking up dull skin, and really, it just sounds too yummy not to try!

10. LemonMilk Alpha Hydroxy Mask — Why spend money on expensive alpha hydroxy facial masks, when you can prepare your own homemade face mask recipe at home? This Lemon-Milk Alpha Hydroxy Mask will perk-up your sleepy skin, making it feel fresh and look bright. Both milk and lemon contain natural alpha hydroxy acids. This is such a great way to save money and kickstart your beauty routine!

Whether you have normal, oily, or dry skin, there is a mask for you. I’m a sucker for at-home spa treatments, so I’ll be trying several of these facial mask recipes this summer! Hope you enjoyed learning more about these 10 incredible homemade face mask recipes!

Source: Dear Crissy


Dandruff – Natural Remedies

Dandruff may be the result of a dry scalp, or skin condition is called seborrheic dermatitis. It can also be caused by eczema, psoriasis or fungus called Malassezia. Dandruff shampoos can be quite effective, but sometimes can be quite harmful. Therefore it is better to use natural ways that are quite effective, and will help to rid of dandruff. We recommend 5 natural dandruff remedies:

Dandruff – Natural Remedies

Coconut oil
Coconut oil Before washing your hair put 3 to 5 tablespoons of coconut oil and massage your head. Allow the oil to work 1 hour, then wash your hair with shampoo.

Olive oil
Mix 2 tablespoons olive oil 1 tablespoon almond oil. Carefully apply the well head and massage the roots. Leave on 15 minutes, then wash your hair. You can also prepare olive oil and rosemary oil. In one tablespoon of olive oil put 10 drops of rosemary oil. Carefully apply it on your hair and massage your head and scalp. Apply this lotion at night and leave on overnight and wash your hair in the morning.

Apple cider vinegar
Mix 60 ml water with 60 ml apple cider vinegar, then place the mixture in a spray bottle. Then spray your hair, wrap it in a towel and leave for 15 minutes to 1 hour. Then wash your hair with baby shampoo. Do this treatment 2 times a week.

lemon juice
Drain fresh lemon juice. Take 2 tablespoons juice, apply it on the scalp and head then massage it. In a cup of water put 1 tablespoon of lemon juice and again massage your hair then wash it after one minute. You can do this treatment several times a week to achieve maximum results.

Source: healthy tavern


Benefits of Shikakai (Acacia Concinna) for your hair

Benefits of Shikakai (Acacia Concinna) for your hair

Shikakai, which is popularly used in India, is a herbal powder which is made from the fruit pods of the Acacia Concinna tree. Shikakai is a wonderful herb that has been used for years for hair care.

Good, lustrous hair is certainly on the wish list of every woman, but in this hectic life we hardly get any time to maintain a beauty regime. Here are a few benefits of Shikakai for your hair:

-Shikakai has low pH level and hence is a natural cleanser for your scalp, cleansing it gently. -Shikakai with its natural elements is believed to promote hair growth and also reduces hair fall.

-It acts as a great detangler to leave you with those beautiful locks that you would love to run your fingers through. -Shikakai also prevents hair from greying naturally.

-Shikakai is rich in essential nutrients like Vitamin C and doesn’t make the scalp dry therby preventing dandruff and other scalp problems.

Source: zee news


10 DIY Homemade Pedicure Tips for Healthy & Soft Feet

A homemade pedicure is one of the easiest and cost effective ways of improving the appearance of your feet and their nails. Essentially, it is a manicure of the feet with a few additions to keep them feeling comfortable in both open toed and enclosed footwear.

The word Pedicure comes from the Latin word ‘pes’ (meaning ‘foot’) and ‘cura’ (meaning ‘care’) and also has relevance to other foot conditions such as ‘pes plano’ which means flat footed.

10 DIY Homemade Pedicure Tips for Healthy & Soft Feet

An at home pedicure is good for several reason,s but most importantly it enables you to check over the feet in detail to identify and hopefully prevent any problems, such as fungal nails and athlete’s foot, before they occur.

A Homemade Pedicure In 10 Simple Steps…

1) Remove Polish

Remove any existing nail polish or gel coverings preferably using a non-solvent-based nail polish remover, this will prevent the nail plate from being damaged and drying out. Try to use cotton bands instead of cotton wool balls so as not to leave any traces of cotton behind.

2) Soak Feet

Use a bowl of warm water or a foot spa and add a drop of shampoo and a tablespoon full of sea salt or Epsom salts as this is good for any cracks in the skin. You can also add an essential oil such as tea tree or eucalyptus. Soak your feet for around 10 to 15 min. If you have heavy calluses you may need to soak them for longer.

3) Exfoliate

Gently exfoliate your feet and heels with a ready-made foot scrub, or a face scrub. This will help with any dead skin and minor calluses. You can also use a pumice stone at this stage or the coarse biodegradable pumice pad to treat minor calluses.

Do not scrub too hard as you may damage the upper layers of your skin and make it sore Use a fine foot file once the feet are completely dry to smooth the skin before applying cream.

Never use a razor to remove calluses as all too often you will end up cutting yourself which may lead to more serious problems. If they are that bad, visit your podiatrist who will scalpel them down for you.

However, remember calluses are there for a reason-to protect your foot from friction and pressure. If you remove them without addressing the cause they may become very sore.

4) Dry Properly

Make sure you dry your feet correctly particularly in between the toes to prevent a damp environment for bacteria and fungus such as athlete’s foot to get hold. Use a foot towel specifically for your feet and no other member of your family to prevent cross infection problems.

5) Tidy Cuticles

Apply a cuticle softener to each cuticle on the toes, carefully rubbing it in and wait 3 to 5 min. Ten very gently push back the cuticles using a clean orange stick.

Tip: if you don’t have a cuticle softener, using olive oil will work just as well.

6) Trim Nails

Carefully trim and cut your toenails with a pair of nail clippers or scissors. Be careful not to cut them to short or you would damage the nail bed or worse make it bleed.

Always use a good quality and clean (preferably sterilised) pair of clippers and cut them straight across.

This will reduce the risk of ingrown nails from cutting down the sides. However, cutting straight across often leads to sharp corners which need to be filed carefully with a special file called a ‘blacks file’ by podiatrists or an ‘ingrown toenail file’ by pedicurists.

Tip: If visiting a salon always make sure the tools/instruments they use have been sterilised correctly so as to avoid bacterial and fungal contamination of the nails and skin.

7) File Nails

A glass file is often best for filing toenails, although metal ones can be sterilised. However, most people opt for the disposable emery board type. File in one direction so as not to split the nail and remove any sharp corners left from cutting as in step six.

8) Massage Your Feet

Give your feet a gentle reflexology style massage to finish your homemade pedicure and make them feel fresh and new again prior to applying any nail polishes.

9) Separate Toes

Use a foam toe separator to separate the toes prior to painting. This will help with any smudging or marking of the nails if you have to walk about while they dry.

10) Polish Nails

Always apply a good quality base coat before applying your nail polish as it will protect your nails from any solvent in the polish, which can lead to destruction of the nail plate over time. Let your nails completely dry before wearing shoes or sandals.

Source: tips zone


Five ways to prevent wrinkles

A wrinkle is a fold, ridge or crease in the skin. Skin wrinkles appear as a result of aging processes habitual sleeping positions,loss of body mass or temporarily, as the result of prolonged immersion in water.

Natural-Ways-to-Prevent-Wrinkles

Here are some ways to prevent wrinkles:

Quit Smoking:

Smoking is not good for skin. It makes you look years older, makes your skin dry and sallow looking, gives you age spots, and adds a ton of wrinkles to your face, especially around your eyes and lips.

It also deprives your skin of oxygen and nutrients, which causes a great deal of damage.

Drink Water:

Drinking lots of water is good, as it moisturises your skin. It also helps to get rid of toxins from your body. The skin looks healthy and radiant when it is properly hydrated.

Get Plenty of Sleep

While sleeping, our bodies produce human growth hormone, which induces growth and cell reproduction. When we don’t get enough sleep, our bodies produce cortisol, a stress hormone. Cortisol slows growth and tissue maintenance and results in dry skin.

Use a Nontoxic Sunscreen

Toxins and free radicals are a big source for wrinkles. So,we should use a nontoxic sunscreen to prevent from getting our skin wrinkled.

Eat Lots of Antioxidants:

Free radicals like pollution and toxins that damage our skin hate antioxidants. Vitamins A, C, & E, and beta carotene are all antioxidants. We should eat some sources of antioxidants like Blueberries spinach, kale, walnuts, artichokes, cranberries and beans

Source: zee news


Chemicals in cosmetics: Is organic the safer way to go

It’s no secret that most women wear makeup every day. A product that was first used by ancient Egyptians is now a multibillion dollar cosmetic industry. However, a growing concern over the safety of certain makeup ingredients has created a new view on our favorite beauty products.

Chemicals in cosmetics

“I decided to switch over to organic makeup about halfway through my modeling career,” Anna Lisa Wagner, a Ford model, told FoxNews.com. “There is a lot of makeup out there that has toxins in them and it can really be detrimental to your health or even just your image.”

Many environmental safety groups encourage consumers to stop using cosmetic products that contain chemical ingredients like parabens and phalates, claiming that they are linked to adverse health effects like cancer and birth defects. But while these accusations sound alarming, not all experts agree.

“[For] the groups that say organic is better and they point to the dangers of the other products, it’s often based on studies that weren’t published or are taking things out of context,” Dr. Doris Day, a clinical associate professor of dermatology at the New York University Langone Medical Center told FoxNews.com. “The studies that I’ve seen that claim things like parabens are harmful or cause breast cancer, there’s nothing substantiated from those.”

Parabens are used in many cosmetics as preservatives to help prevent bacteria from growing in the product.

A 2004 study by biochemist Philippa Darbre has been widely cited for linking parabens to cancer. However, the small study was discredited by many toxicologists and cancer research organizations. The American Cancer Society issued a statement saying, “the study did not show that parabens caused or contributed to breast cancer development— it only showed that they were there.”

Even though there is no conclusive evidence to prove the harmful effects from cosmetic ingredients, some beauty professionals still remain skeptical.

According to Eva Scrivo, a celebrity makeup artist and author of “Eva Scrivo on Beauty,” we all need to be more conscious of what we are putting on our bodies.

“Women are becoming more aware of things like phalates and hormone disruptors, things that have been found in cosmetics for many years,” Scrivo told FoxNews.com. “It’s interesting how many of these ingredients have not been regulated and there really is no testing on a lot of cosmetics.”

The Food and Drug Administration (FDA) does not have the authority to regulate cosmetic ingredients— but that doesn’t mean beauty products are not tested.

The cosmetic industry keeps a thorough safety record through the Cosmetic Ingredient Review (CIR), a non-profit organization that works under the review of the FDA. The CIR appoints a panel of experts composed of dermatologists, chemists, medical researchers, and toxicologists to test and assess the safety of ingredients used in cosmetics.

“Most of the ingredients that you see in a product go through extensive testing for something called mutagenicity and teratogenicity. Mutagenicity is the capability of causing cancer and other problems; mutations and teratogenicity are problems in a growing baby,” Day explained. “They also have to check for lead, mercury, arsenic and other toxins that we know are naturally found in the earth to make sure that they are at a certain level [FDA allowed parts per million].”

Many of Scrivo’s clients ask if organic products are better than traditional, but it’s a personal choice, she said. Even choosing a natural product that omits certain harmful ingredients, such as parabens and phalates, can be a good option.

“It doesn’t have to necessarily be organic– it just has to not have some of the harmful ingredients in the product,” Scrivo said.

If you are concerned about parabens and other cosmetic chemicals, don’t just rely on the label “organic” to ensure its safety. Look at ingredient lists or check store websites like Sephora.com that include descriptions of the cosmetic formulation ingredients.

Source: Fox news